If you are using XFCE desktop environment (DE) you might have seen that it isn’t possible to access folders directly from the menu.
This does not need to defer users of using the many advantages of this DE.
In this post I quickly show how you can install and use Alacarte, a free menu editor, to not only add folders, but also .AppImage applications.
After setting this menu editor you will be able to quickly access your resources and optimize your workflow.
Install Alacarte
Alacarte is available in the regular Ubuntu repositories. Open your terminal and run the following command:
sudo apt install alacarte
After installation, open the application from your terminal:
alacarte
Create a new menu
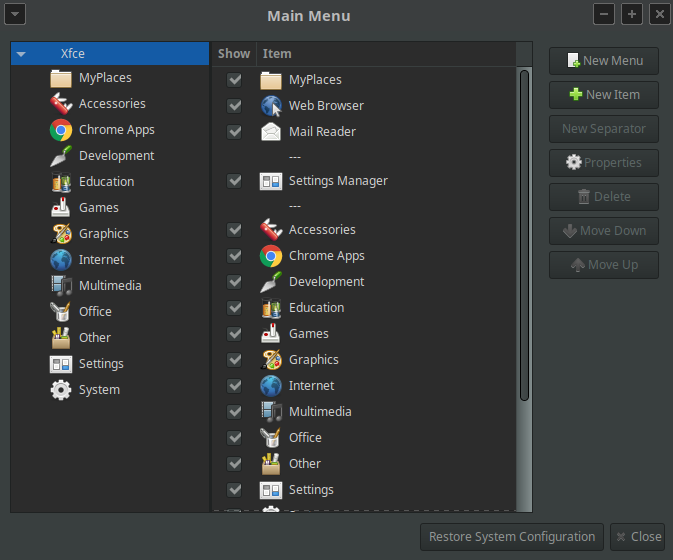
On the far right of the Alacarte window, press “New Menu” entry (see image below).
You will need to give it a name. I used MyPlaces.
Below on the left, you can see the newly created menu MyPlaces.
Create a new menu entry
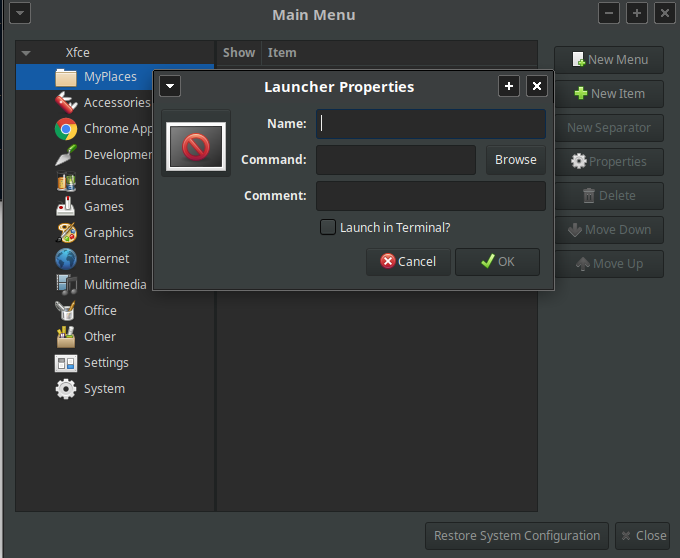
Select the menu on the left where you want to add a new entry, and click on “New item” option on the right of the window.
A “Launcher Properties” pop-up window opens for you to create the menu entry.
Menu entry for a folder
If you want to create an entry on your menu to point to a folder you will need to call your file manager, in Xubuntu’s case thunar, and give it the full path.
For instance, if you want to create an entry for your Desktop folder you will have:
Name: Desktop            # the name of the entry
Command: thunar /home/USER/Desktop     # where `USER` should be changed to your username
Comment: Go to Desktop    # (optional) what will appear in the tooltip when you hover your mouse on the entry
Then find the icon box, and click on it. Use the file browser that will appear to set a custom icon for your folder shortcut.
If you need help searching for an icon, see below.
Menu entry for an application
If you want to create an entry on your menu to an application you just need to browse to where to the application is.
For instance, if I want to add BitWarden AppImage to my menu I will use the following settings on Alacarte “Launcher Properties” window:
Name: BitWarden            # the name of the entry
Command: <full-path>/Bitwarden.AppImage     # where <full-path> should be changed to the full path to your application
Comment: Open BitWarden    # (optional) what will appear in the tooltip when you hover your mouse on the entry
For an application you also need to choose an icon. Click on the icon box and use the file browser to choose an icon.
If you are unsure how to choose an icon check below.
Choosing an icon
There are a several folders where icons can be stored, which can be confusing.
An easy way to find an icon is to go to your /usr/share/applications/ to see the ones your applications are currently using.
thunar /usr/share/applications/
Choose one you like and drag it into a text editor. Then, scroll down to the line Icon= to find the name of the icon it uses.
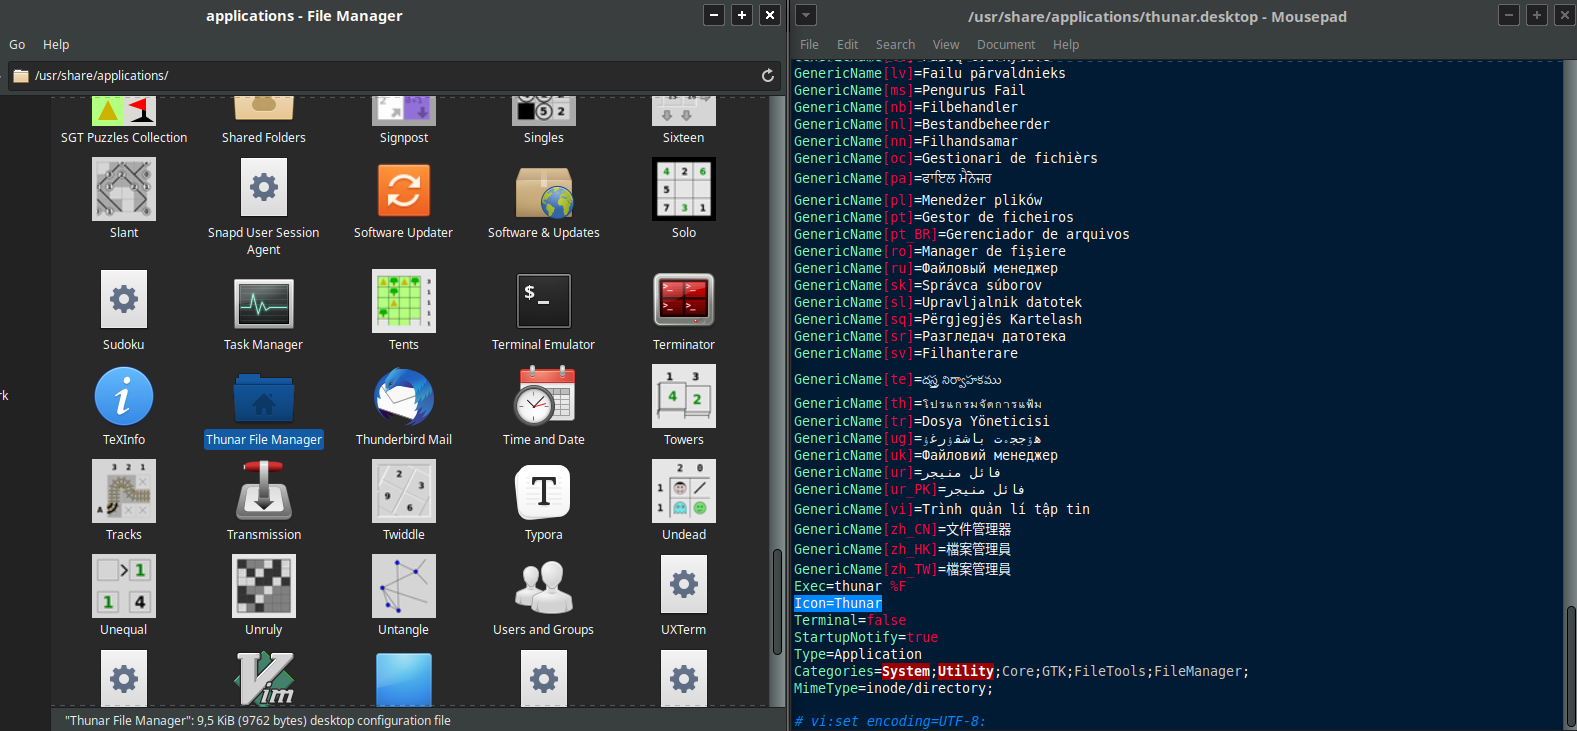
In the image above, I chose the Thunar File Manager and dragged it to Mousepad, from where I can see it is using the icon named thunar.
Now we want to find where that icon, thunar, in .png format is located.
To to this, I’ll open a terminal and execute:
find /usr/share -iname "thunar.png"
/usr/share/icons/elementary-xfce/apps/24/Thunar.png /usr/share/icons/elementary-xfce/apps/32/Thunar.png /usr/share/icons/elementary-xfce/apps/64/Thunar.png /usr/share/icons/elementary-xfce/apps/96/Thunar.png /usr/share/icons/elementary-xfce/apps/16/Thunar.png /usr/share/icons/elementary-xfce/apps/48/Thunar.png /usr/share/icons/hicolor/128x128/apps/Thunar.png /usr/share/icons/hicolor/24x24/apps/Thunar.png /usr/share/icons/hicolor/16x16/apps/Thunar.png /usr/share/icons/hicolor/64x64/apps/Thunar.png /usr/share/icons/hicolor/48x48/apps/Thunar.png
The path depends on the icon theme you use. The icon sizes for menu entries are typically 16x16.
Go back to your Alacarte “Launcher Properties” pop-up window, click on the icon box and choose one of the paths above.
For the examples above :
- on how to add a menu entry for a folder, I used the icon
/usr/share/icons/elementary-xfce/apps/16/Thunar.png. - on how to add a menu entry for an application, I used the icon
/usr/share/icons/elementary-xfce/status/16/security-medium.png.
And voila! Hope this helps you improve your menu and take the best out of your XFCE DE.