If you enjoy automating your workflows, a Slack bot might be just what you need.
Slack is an instant messaging program especially used by organizations, but in this case we will create a Slack channel just for our own use.
On the other hand, a Slack bot is essentially a type of Slack App designed to interact with users via conversation.
The three main kinds of bots we can make are:
- Reply bots that respond when someone uses a specific word or phrase.
- Notification bots that send updates according to your defined triggers.
- Slash command bots that run when a specific command is issued.
In this post I will outline how to make a quick and simple slash command bot that will greet us upon the command \hello 🤗
What we need
- Slack account
- Ngrok reverse proxy that will front our local web service (not secure, only use for local development and testing purposes!)
- Python to develop our app
slack_boltPython package to interact with Slack’s API
Tutorial
Step 1. Create a Slack App
To get started, create a new Slack App on api.slack.com: click on the button Create an app.
Then select the name you want to give the app (for instance, “HelloWorld”) and the workspace where you want to build the app on. Make sure you already have one workspace in your Slack channel.
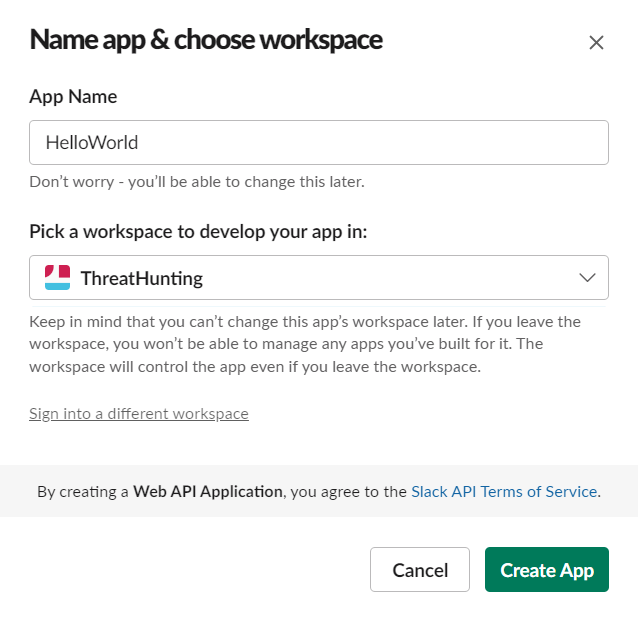
Click on Create App.
Set Permissions
In order for our bot to be able to do things like read or post messages, we have first to give it permission to do so.
On the left pane, navigate to OAuth & Permissions.
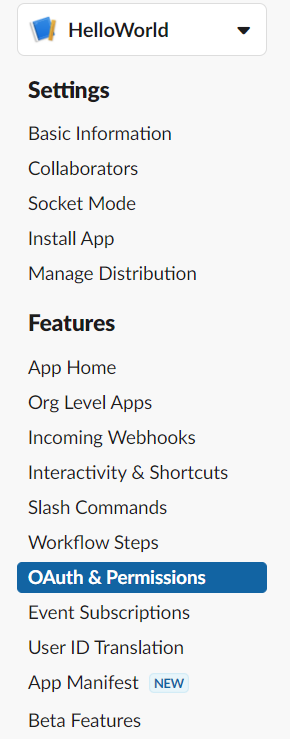
Then scroll down to Scopes | Bot Token Scopes and click on Add an OAuth Scope.
For now let’s use:
chat:write- Send messages as HelloWorldcommands- Add shortcuts and/or slash commands that people can use
Also, to be able to interact with the bot, navigate to App Home on the left pane. Scroll down and under Messages make sure you have activated the following line:

Install the app
Scroll up to the top of OAuth & Permissions page and click on Install to Workspace under OAuth Tokens for Your Workspace.
Finally, we will have a Bot User OAuth Token in the format xoxb-****-****-****, that will be used to communicate with Slack’s Platform.
Step 2. Run ngrok
First you need to download ngrok from its official website.
This is a command line application, so you need to open a terminal and run ngrok.exe http 3000(I am doing this in Windows).
Once it’s opened, you’ll see a screen like the one below.
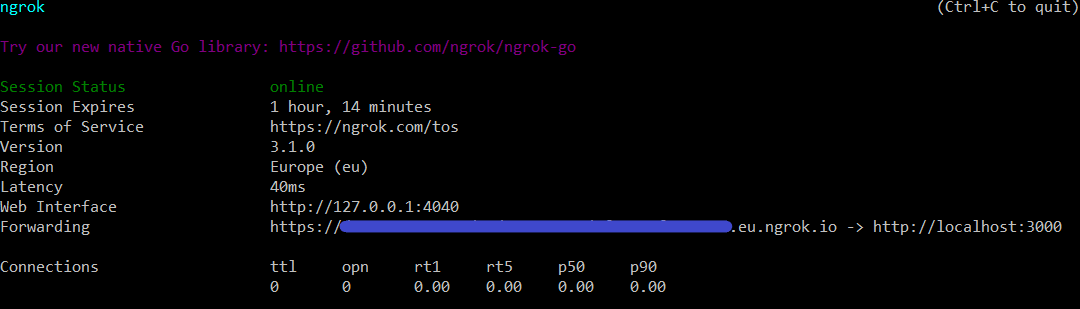
The field Forwarding gives information about the public address that Slack will use to send our app events.
Step 3. Create a slash command
Let’s now create a simple command with which we will be able to greet our bot.
On api.slack.com on the left pane, navigate to Slash Commands and Create New Command with the following settings:
- Command:
/hello - Request URL:
<ngrok-URL-above.ngrok.io*>/slack/events - Short Description: Greet our bot!
Then Save changes using the button on the bottom right.
*ngrok-URL-above is the URL on the Forwarding field on the previous image.
Step 4. Python code
With everything set, let’s develop our bot!
First, install the Bolt python package.
pip install slack_bolt
What you will need:
SLACK_BOT_TOKEN- this is the token we saw previously.SLACK_SIGNING_SECRET- this token can be found in Slack API. Navigate to Settings | Basic Information on the left pane of the app and under App Credentials copy your Signing Secret.- Make sure you have your ngrok running. See step 2.
Store your tokens as environment variables
These tokens should not be shared publicly, so first create a file slack_secrets.py as follows:
import os
# Save your Bot token and Signing secret as environment variables
def set_environment_variables():
    os.environ["SLACK_BOT_TOKEN"] = "xoxb-****-****"  	# your Bot token
    os.environ["SLACK_SIGNING_SECRET"] = "xapp-****-****" 	# your Signing Secret token
If you are using some type of version control, like git, make sure you add this file to be excluded, for instance, in .gitignore.
This way, you will have the tokens stored only locally.
Note: if you want to access them across devices, you can use, for instance, a secure note on your password manager to store them temporally.
Write the bot
Then create a file named bot.py and use the following code.
Make sure you read the comments and understand what you are coding.
import os
from slack_bolt import App
from slack_secrets import set_environment_variables     # our secrets

def init_app(port):

    # Check if the environment variables were correctly set
    set_environment_variables()
    if os.environ.get('SLACK_BOT_TOKEN', -1) == -1 or os.environ.get('SLACK_SIGNING_SECRET', -1) == -1:
        print("Something went wrong setting the environment variables")
        exit()

    # Initialize the app with your tokens
    app = App(
        token=os.environ.get("SLACK_BOT_TOKEN"),
        signing_secret=os.environ.get("SLACK_SIGNING_SECRET")
    )

    # Listen for the command "/hello"
    @app.command("/hello")
    def hello_command(ack, body, say):
        ack()
        user_id = body["user_id"]
        say(f"Hi <@{user_id}>!")

    # Start a simple HTTP server on the port given
    app.start(port=port)

if __name__ == '__main__':
    # First, make sure you have run "./ngrok http 3000" on another terminal
    ngrok_port = int(os.environ.get("PORT", 3000))
    init_app(ngrok_port)
Save your changes.
Step 5. Run the bot
Execute the app:
python .\bot.py
You will have a response like so:
Bolt app is running! (development server)
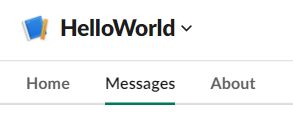
Go back to your Slack Channel and go to your app.
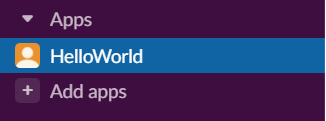
Go to Messages tab.
Write the /hello command.
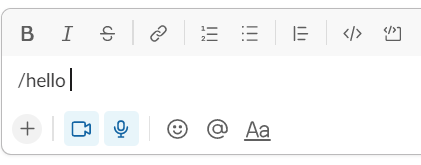
And voilà!

Next steps
Hopefully this guide got you started with Slack and its powerful automations that might allow you to quickly optimize your workflows.
At this point there’s a few things we can do:
-
Use a connection protocol more secure: using Socket Mode to communicate with your app without the necessity of exposing a public HTTP request URL.
-
Try listening for events, instead of commands. Here is a good tutorial.
In the future I will share how I am going to use Slack apps to gather Threat Intel, stay tuned 😊